

It is always difficult to capture a sunset. Just a few seconds available and everything changes in an instant.
I took the following image towards evening, when the sun was going down and Kyoto was enveloped in a warm and magical light. At least, that’s what I remember. Unfortunately, the photo I found on my memory card showed nothing of the beauty of that moment. Fortunately, I took the photo in RAW format, and this enabled me to perform a small post-production miracle, considering the disastrous original image.
-

- Final image

-

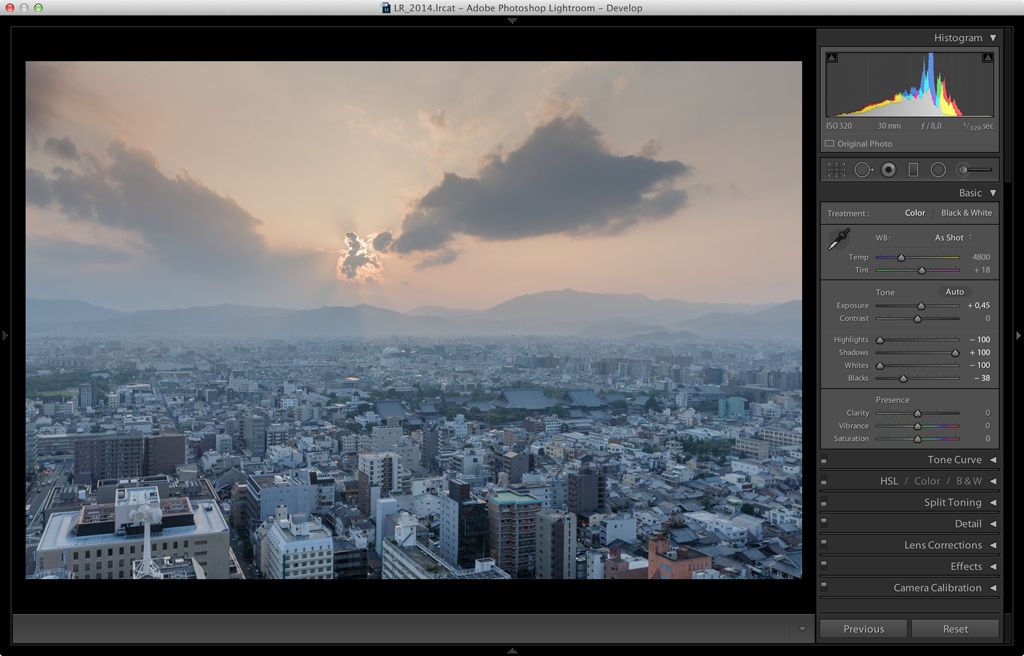
- Original RAW image

The first step in the process, if done correctly, is to choose carefully what it is you want to alter in your image. In my case, I wanted to get back the light I saw on the buildings and reintroduce the warm colours, without taking away from the sunset or losing the details of the light among the clouds.
Before starting to play around with cursors and adjustment sliders, I moved down to the least explored and lowest section, namely Lightroom, the area dedicated to Lens Corrections. Using the few available options, you can make considerable improvements to your image, with very little effort. In fact, choosing ‘Enable Profile Correction’ and ‘Remove Chromatic Aberration’, you solve all the perspective-related issues. For example, in my case, I removed the pronounced vignetting and the deformation effects.

At this point, now that your starting image has no picture defects, you can move on to the actual development.
In my case, I made few, but radical, alterations. Using the Highlights slider, I reduced the Lights and, at the same time, increased the Shadows value to make them less dark. This allowed me to obtain a bright image without exaggerating the exposure.
To give depth of image and a three-dimensional quality to the buildings, I adjusted the Clarity, which allowed me to increase the contrast only in the intermediate areas, without altering the shadows or the light. Together with the contrast, I also slightly increased the Vibrance value. In this way, I increased the amount of colour in the image without going over the top, as can often happen when you simply alter the saturation.

To further improve some of the pixels, especially in areas of light, without losing any detail, I made some adjustments to the Tone Curve. In particular, adding just one point in the highest part and lifting it just slightly, I increased the contrast without causing any damage to the light and shadow, by merely introducing a small touch of light.

Now that the image has been corrected in terms of luminosity and general colour, I move on to specific adjustments of single colours and channels.
Thanks to the Luminance slider, it is possible to alter the luminosity of a single colour. In my case, I wanted to darken the cold areas of the buildings a little and warm up and brighten the the warm tones of the sky. The result is an image full of light, very clear in every detail and correctly balanced. What is missing now is the warmth of the sunset.

In order to add warmth to the image without smothering it, as can often happen by just using colour temperature, I use the sliders found in the Split Toning section. I find these controls really useful because, in a case such as this one, they enable me to separate the hue values that can be applied to the Light and Shadow. Compared to simple temperature, the difference lies precisely in this separation.

By altering the temperature, both the light and the shadow would have have undergone the same modification. In contrast, in this case, I give warmth to the light and cool down the shadows, in order to obtain a more natural sunset, instead of a uniformly warm image.


