Today, various methods exist for creating a black and white image; from the shot taken directly by the camera, right up to complex fusion methods within Photoshop. For this article, we will take the easy route through Lightroom.
Before getting started with image development and post-production, I would like to say a few quick words about how NOT to do black and white:
– Taking the image in JPG format, directly from the camera – once the image is taken, you can’t go back; you can’t choose to do it in colour. It is much easier to make a black and white image from a colour one than the other way around. Once you have lost the colours, it’s very hard to get them back.
– Choosing to convert the image to grayscale – by doing this, you will obtain one single channel with 256 shades of grey, instead of the 3 RGB channels with 256×3 shades of colour.
– Choosing to remove the saturation in Photoshop – not that dangerous, but there are other, decidedly more elegant, methods:
– Lightroom ‘Black and White’ (or Camera RAW).
As usual, the starting image is fairly disastrous (I am a terrible photographer). The first step is to correct the optical lens defects of the overall image: for example, the fading of the light around the edges (vignetting) and the geometric distortion caused by the wide angle lens. To do this, I select the correction functions in the LENS CORRECTION panel.
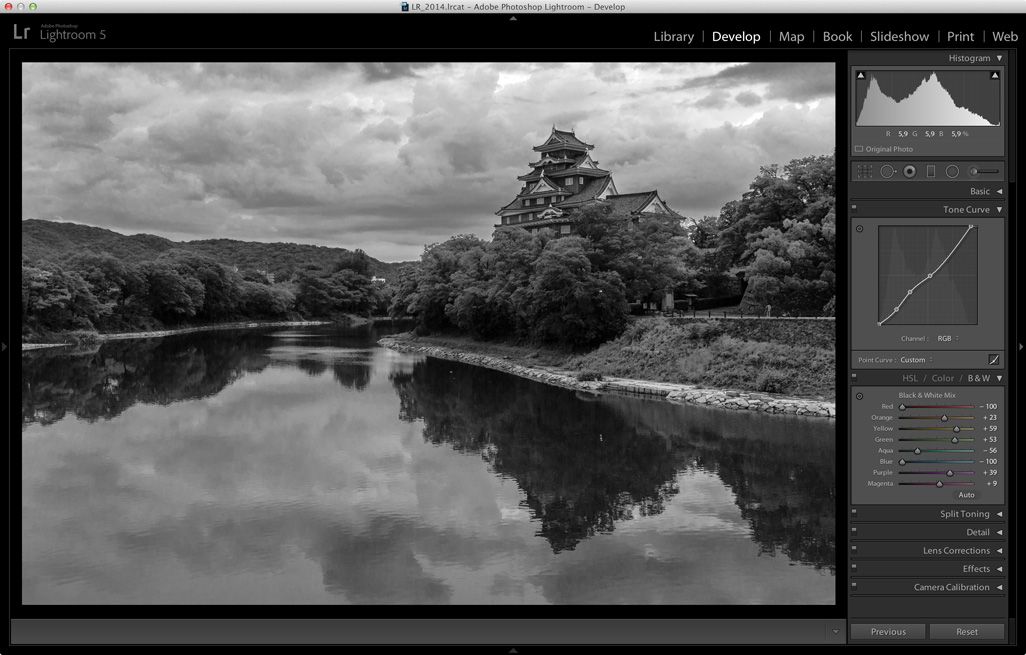
Now that the image is ready, I can start to develop it, starting from the BASIC section but using BLACK & WHITE instead of COLOR mode.
Is that it? Not at all.
This is only the first step to take all the work of the colour image and transfer it to black and white, without, however, losing all the important information, i.e. the colour channels.
Let’s move on:
Having chosen to keep the colour information, we won’t actually see it, as it is hidden by the Black & White ‘mode’, but all the adjustments are still available. In this case, I will use the single colour adjusters found in the B&W panel.
To help me out, seeing as I don’t necessarily know exactly which channel I want to adjust, I can use the tool in the top left of this panel

This little ball with two vertical arrows allows you to work directly on the image and adjust more precisely the colour on which you want to work. In my case, I want to make the sky stand out (by making it darker) and give more light to the vegetation (by making it lighter).

In order not to end up with very black shadows, I lighten everything up a little using the TONE CURVE panel.
To create a focus point on the castle and make the rest of the image less important, I create a radial filter with the exposure slightly to the left. This allows me to leave the inside area unchanged and very slightly darken the area outside the filter.
Are you wondering why I’m adding vignetting after I removed it earlier?
This sort of vignetting can be moved around, whereas the vignetting provided by a lens is always central and moves outwards. In this case, I have more control.
The image is now almost finished. However, I want to add a few personal touches.
In particular, I choose to use SPLIT TONING to add a touch of colour both to the light and to the shadows. On the one hand, adding warmth, on the other, making it cooler.
This creates an image that is less digital and has more depth. It is just an almost imperceptible spot of colour but it can make all the difference.
For a perfect finish, I also add a light film grain to make the image less artificial.
I prefer to go overboard with the quantity but use a very fine grain.
This is just a starting point for creating black and white images. Next time, I will try to go more in depth by taking a route that is more complex but even more interesting from a creative point of view.
Good luck.


