

DEEP
Strong depth of field is not always unusual, by any means, but it can be pushed. By pushing, I mean working on a scene that goes from the distance to as close as absolutely possible while still staying sharp (Anseld Adams, incidentally, used the term ‘Near-Far’ for pictures like this). The first control is the aperture — stop down to the minimum — but it also involves choosing the lens focal length. The wider the angle, the better chance you have of making absolutely everything in view pin-sharp at a small aperture. However, focal length and aperture are only tools for helping with the idea of deep, as here, in one of Angkor’s ruined temples. The idea is pulling together into one image the different scales of a scene, from the leaves and texture of an ancient sandstone bas-relief that are only inches away, to the temple galleries that stretch into the distance, even through the far gateway. So, suitable close and distant subjects together are important, which means finding an exact camera position. Next is positioning the camera as close as possible for the depth of field at minimum aperture to just cover the range. The focus point for this is not exactly in the middle, but slightly nearer to the camera.


IMPOSSIBLY DEEP
The laws of physics set limits to the depth of field possible with any particular lens. It doesn’t help the photography much to get into equations, but one occasion when you really notice these limits is in close-up. Practically, the closer you get to macro, the less depth of field you can expect. You may not want full depth of field, but if you do, you can’t have it by normal means. In this still-life below, there is no way to get front-to-back sharpness with a normal camera lens. So what about extraordinary means? One of the convenient things about digital photography is that you can combine images digitally, as in stitching and HDR, to name just two obvious ways. Slightly less obvious, but very smart, is focus blending, in which the software takes a set of photographs all shot from the same position but each focused at different distances, from close to far, and chooses the sharpest bits from each of them. It’s not infallible, because the scale changes as you change focus, but it’s usually pretty good, as here, and I’m using software called Helicon Focus.


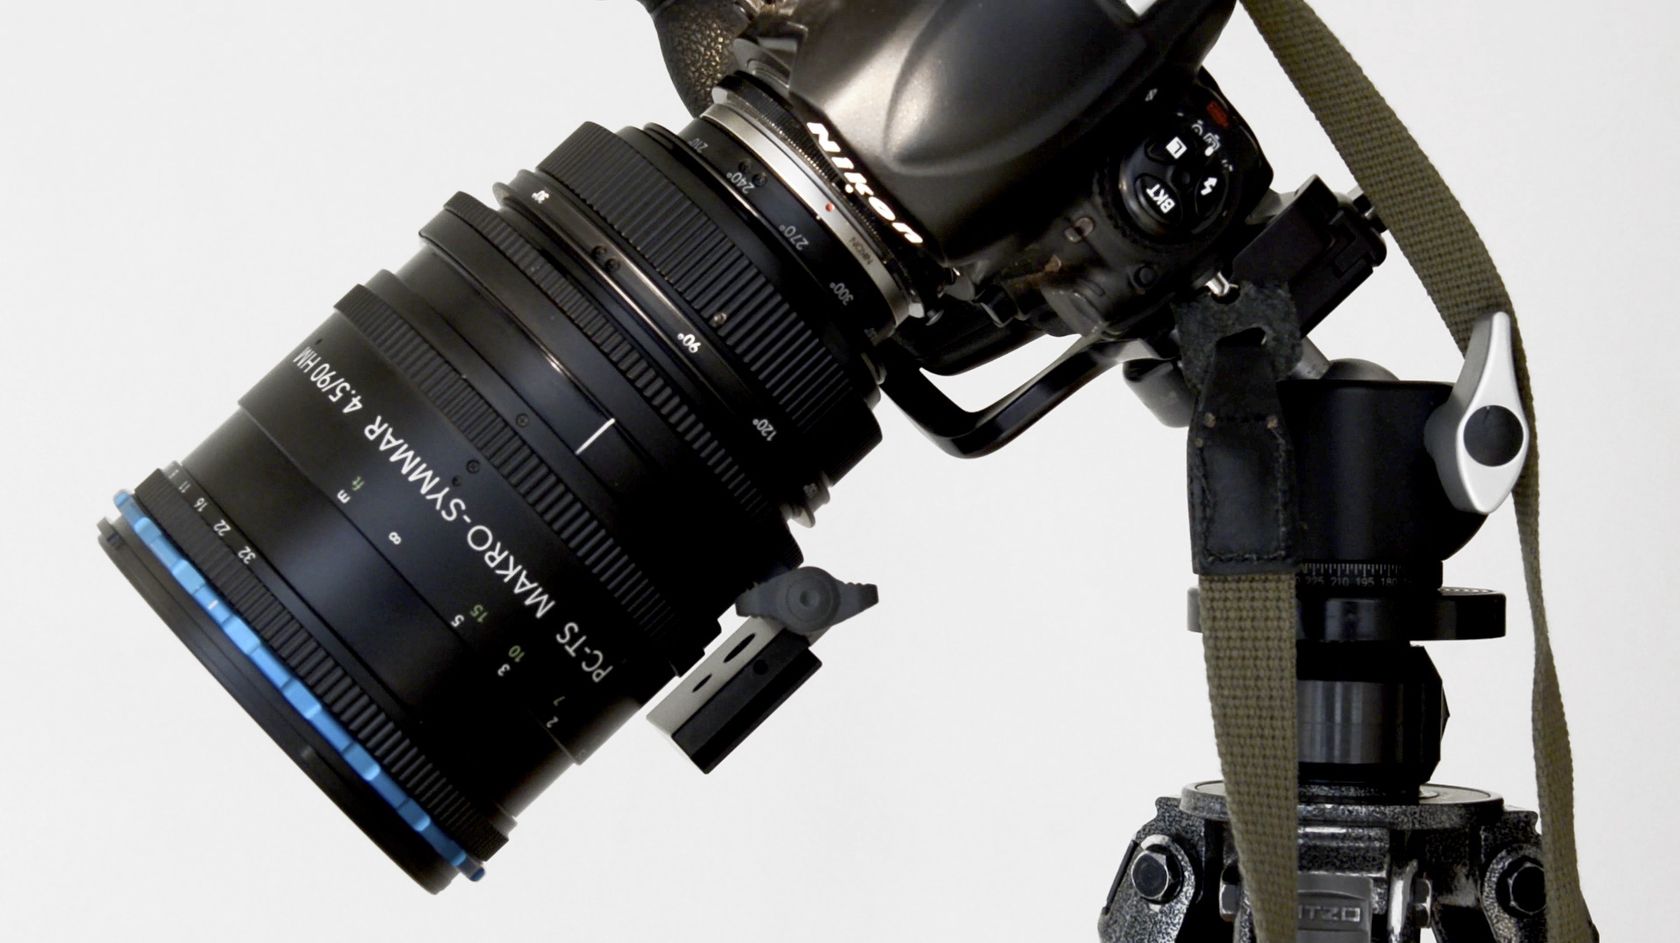

If you photographed in pre-digital days and used a large-format camera, you knew what the Scheimpflug Principle is. Sounds daunting, and takes some getting used to, but basically, the front part that held lens and the back part that held the film did not have to be fixed and parallel to each other (which they are in almost all cameras). In a normal camera, if you change focus, the sharpest areas are simply nearer or farther away, and depth of field goes from near to far also. Not so if you tilt either the lens or the back. Imagine the plane of focus, which is not something you normally have to think about, as a sheet of glass upright in front of you and facing you. So far so good with a normal camera and lens. But if you could tilt the lens forward, this plane (imagined as a sheet of glass) also tilts forward. Why would you want to do that? Because the things you may need to be sharp in the image might lie on a flat surface, like a table, or at a slight angle. There are a few specialised lenses that do this for DSLRs, so you no longer have to use large-format film. This is really one case where it’s fairly easy to use once you get your hands on the equipment, but becomes difficult in words, so I’ll let the illustrations below tell the story.
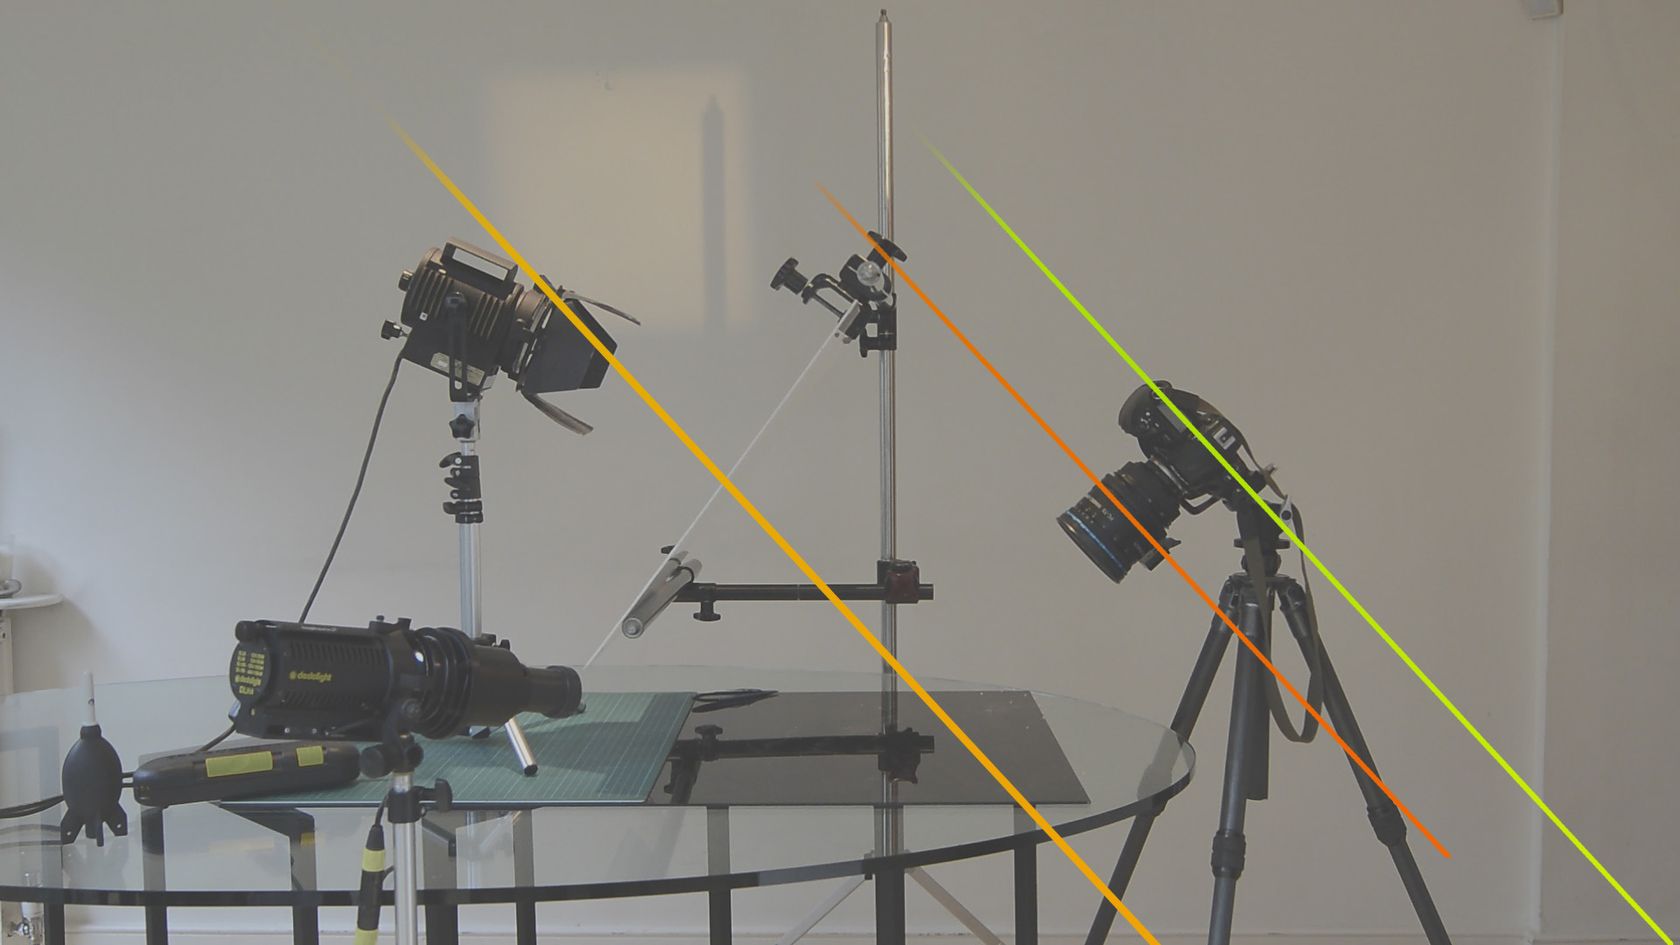
Un-tilted, the lens plane (orange) is parallel to the sensor (green) and the plane of sharp focus (yellow). The point of the Scheimpflug Principle is that all three planes meet somehwere – in this case at infinity.
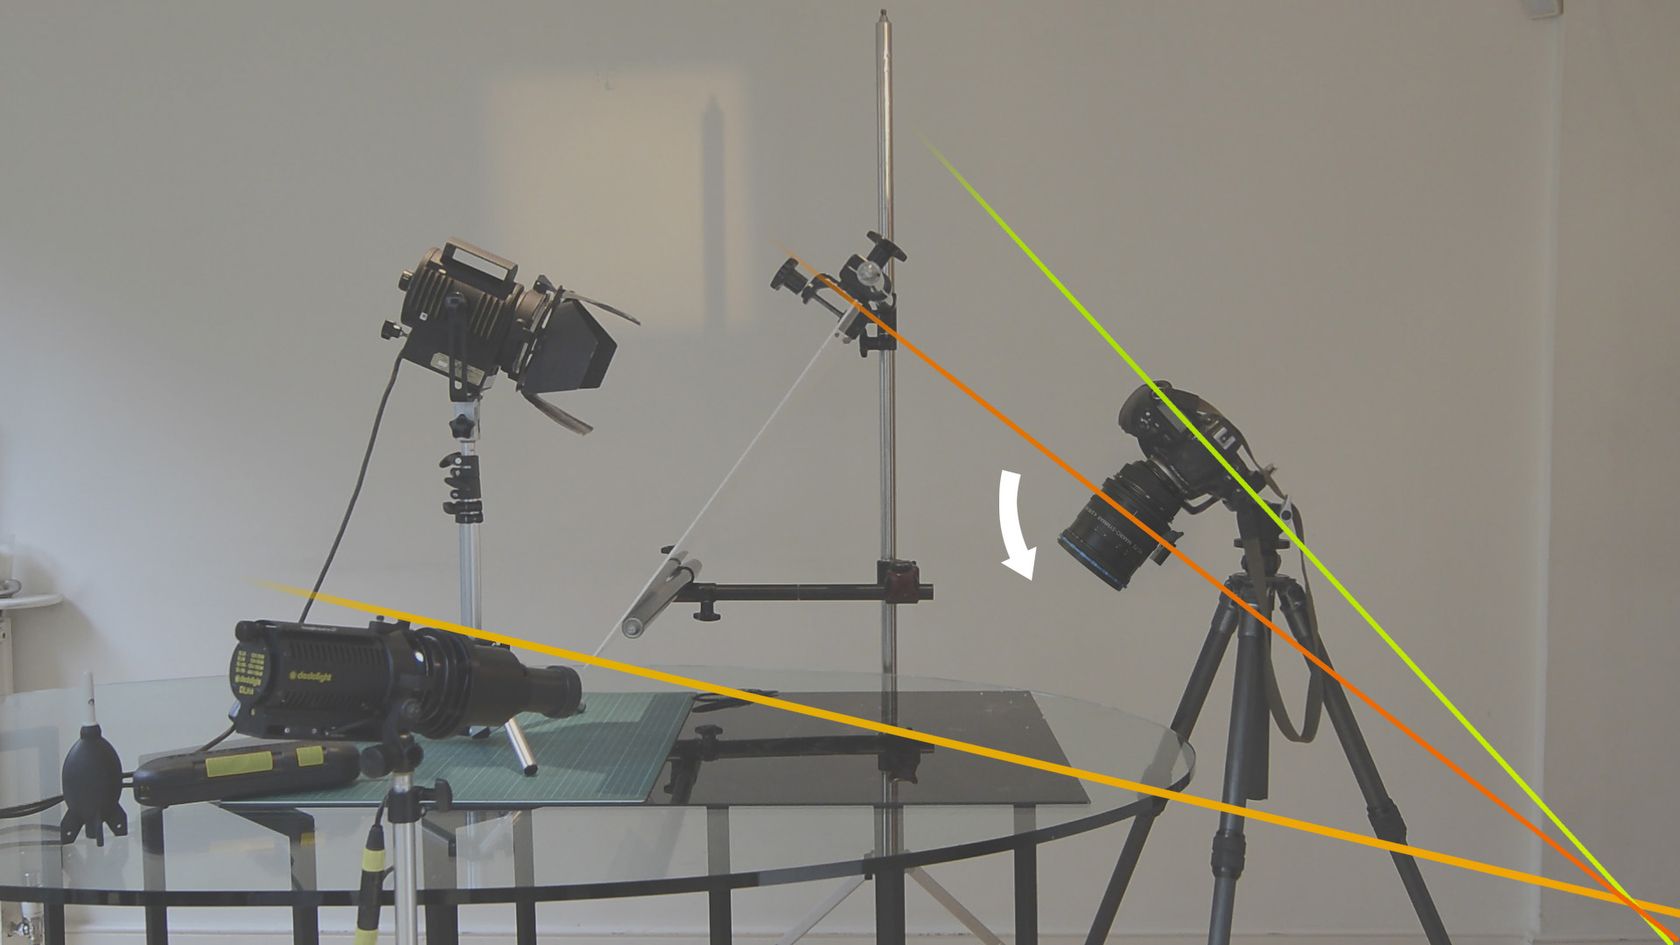
Tilting the lens forward tilts the lens plane. Where this meets the sensor plane (lower right corner) is where the plane of sharp focus also has to meet
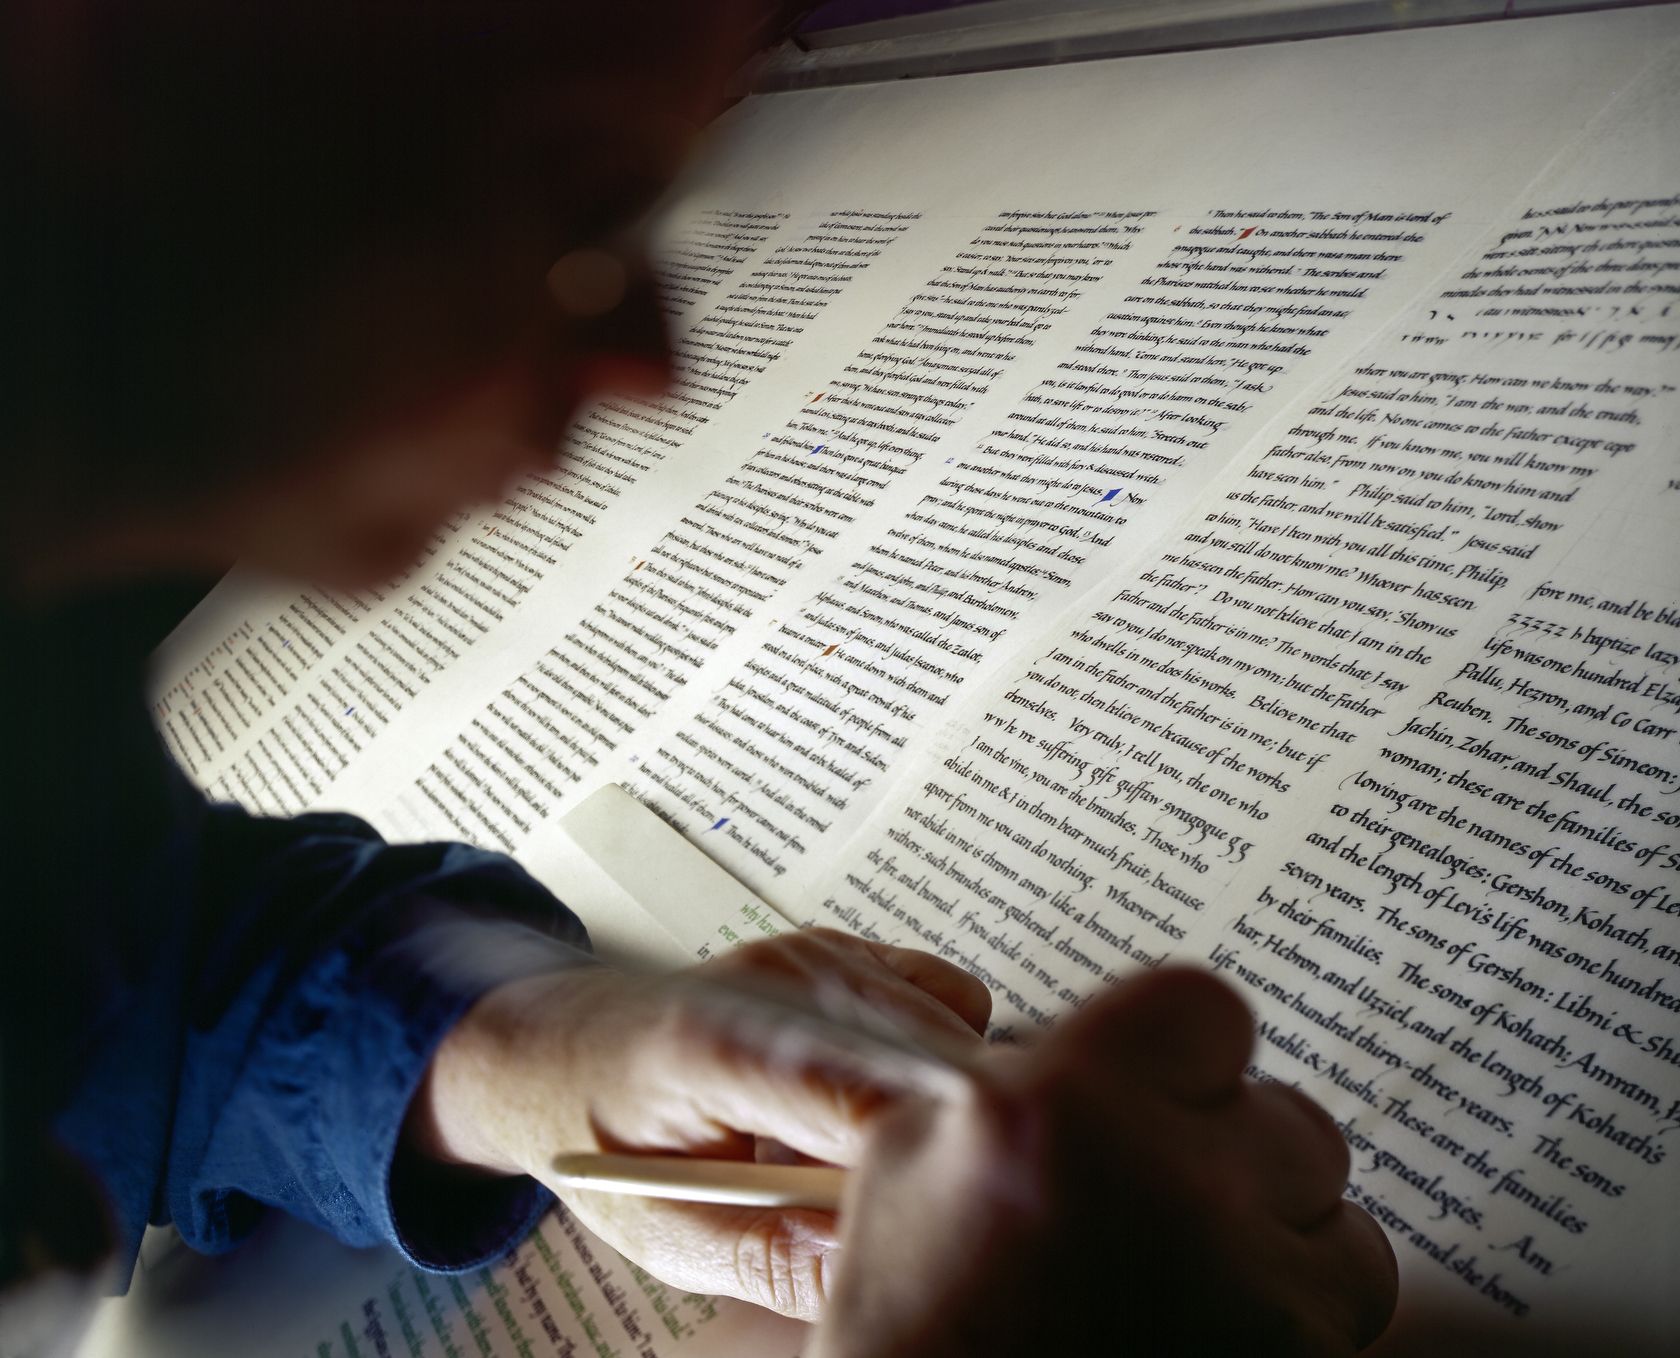
And, in a similar way to doing the reverse of expectations in shallow focus (above), you can use a tilt lens in the opposite way for which it was intended. This is counter-focus, and here’s an example. If you tilt back on a scene that is tilting forward, you can get the most extreme selective focus possible — with the aperture wide open, naturally. I wanted to do this here, in a scriptorium where scribes (yes, they’re really called that) were working on a hand-written bible, because I wanted to focus entirely on just one or two words. It’s a standard focal length of lens, tilted right back, and for good measure, as I was using 4×5-inch film in a studio camera, the film back is tilted far forward. This is the exact opposite of the way these cameras were designed to be used, but camera manufacturers can’t always guess what photographers will do.

Using Depth of Field Creatively – Part One
© Text, photographs and illustrations by Michael Freeman